Settings
The Settings section in the phishing module provides comprehensive and precise control over all elements related to configuring and operating phishing campaigns within the platform. Through this section, administrators can manage and categorize content, configure email accounts used for sending and receiving, create links used within messages, and fully control service activation and the automated handling of responses.
This section helps establish the right environment for accurately simulating phishing attacks, enhancing the effectiveness of awareness campaigns, and enabling specialized teams to analyze employee behavior and interactions with various scenarios.
The settings are organized into several tabs, each serving a specific functional role. It is recommended to configure these settings carefully before launching any phishing campaign to ensure realistic results and accurate reporting.
Tab: Phishing Classifications

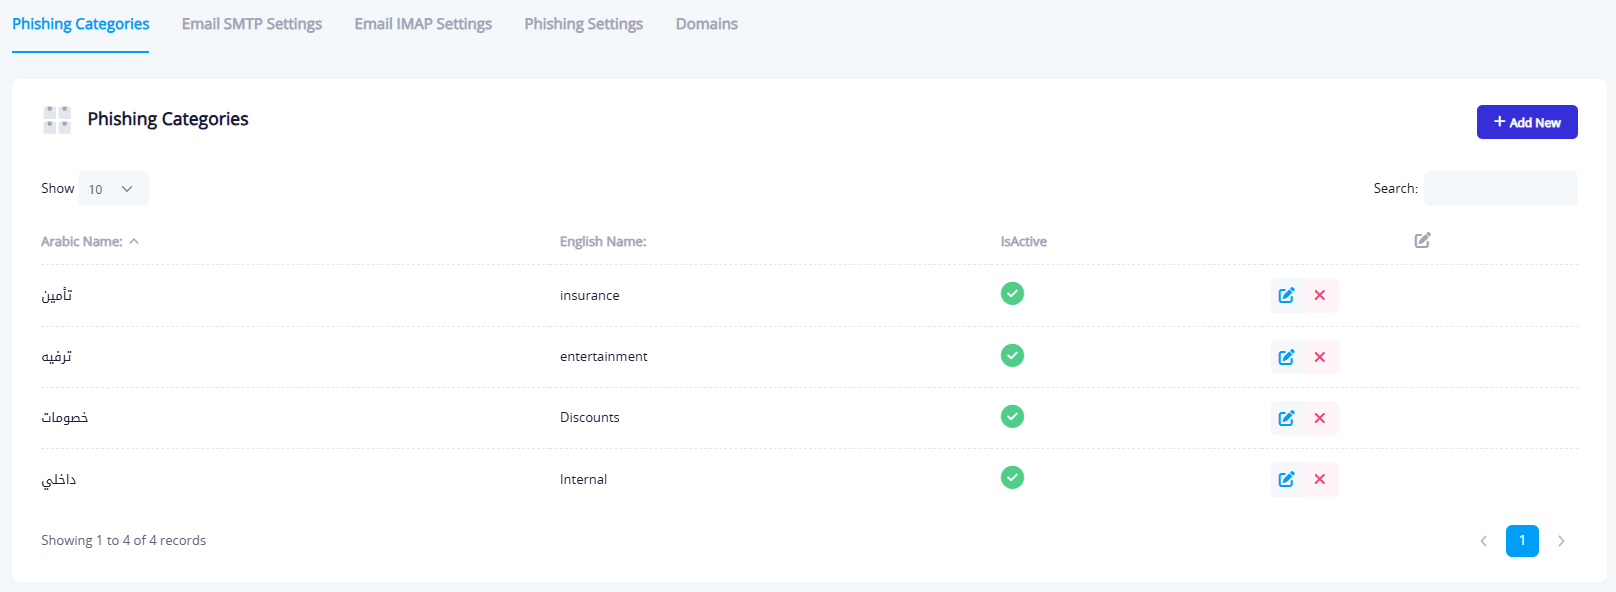
This tab is used to manage the types or categories of phishing messages used in the system. You can:
- Add new classifications (e.g., Entertainment, Security, Discounts, Internal)
- Edit or delete existing classifications
- Activate or deactivate classifications as needed
These classifications help in organizing campaigns and aligning the phishing message with a specific scenario or theme.
Tab: Email Sending Settings

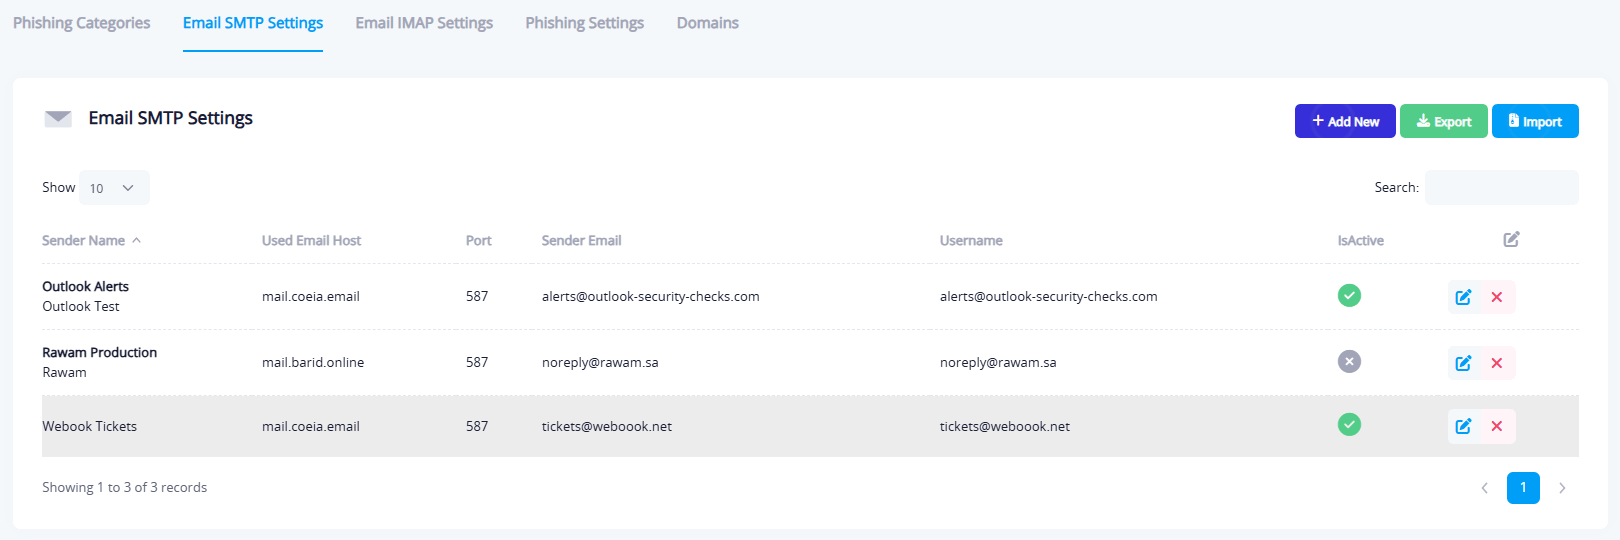
This tab allows administrators to manage the email accounts used to send phishing simulation emails. It includes the following fields:
- Sender Display Name: The name shown to the recipient.
- Sender Email & Username: The actual email account used to send messages.
- Port Number & SMTP Server: Configuration for the outgoing mail server.
- Activation Status: Toggle to enable or disable the account.
You can add multiple senders to balance the load or disguise the campaign.

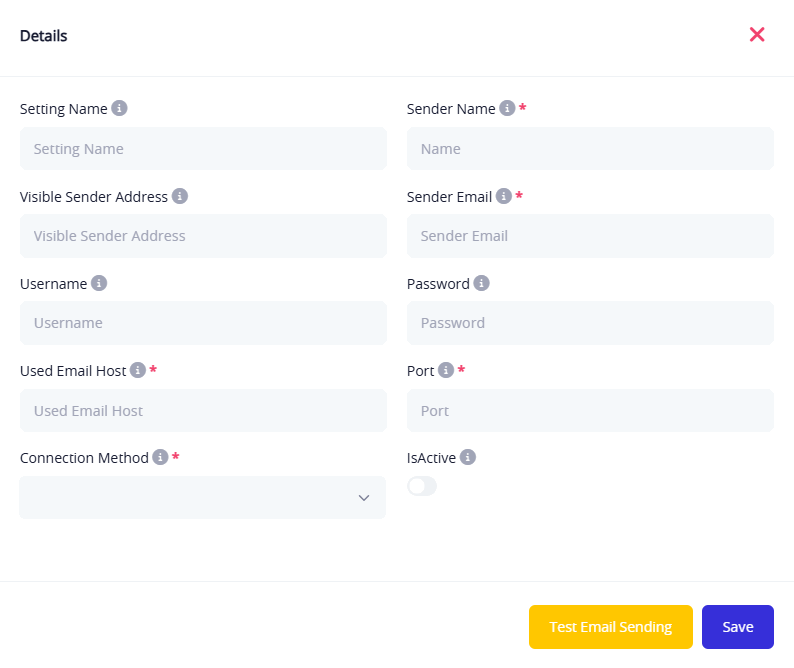
Fields Explained:
- Setting Name: A label for organizing multiple configurations.
- Sender Name: A descriptive internal name for this configuration.
- Visible Sender Address : The email shown to recipients (can differ from the real one for simulation purposes).
- Sender Email (Required): The actual sending address (SMTP username); must be a valid email.
- Username: Used to log in to the mailbox (same as sender email or a separate identifier).
- Password: Password for the sending account.
- Used Email Host: e.g.,
mail.example.com - Port (Required): e.g., 587 or 465, based on the selected connection method.
- Connection Method (Required):
- SMTP with SSL
- SMTP with TLS
- Plain SMTP
- Active: Toggle to activate/deactivate this configuration for use in campaigns.
Buttons at the Bottom:
- Save: Save the configuration after completing all fields.
- Test Email: Send a test message to verify that settings are working before using them in a live campaign.
Tab: Mailbox Access Settings

This tab is used to configure mailbox accounts that the system will access to read employee replies to phishing simulation emails. It includes:
- Mail Server Address (IMAP)
- Port Number
- Username & Password (preconfigured)
- Mailbox Folder Name (e.g., INBOX)
- Enable Delete After Reading (optional)
This feature is helpful for analyzing auto-responses or tracking post-interaction behavior.
You can add a mailbox access configuration:
Fields Explained:
- Mail Server Address (Required): e.g.,
mail.example.com(typically the IMAP server). - Port Number (Required): e.g., 993 for IMAP or 995 for POP3.
- Mailbox Folder (Required): e.g.,
INBOX - Username (Required): Full email address like
[email protected]. - Password (Required): Email account password.
- Connection Method (Required):
Connection Method Options:
- None: No encryption (not recommended).
- Auto: Automatically chooses the best method based on server settings.
- SSL On Connect: Starts connection with SSL (secure), often used with ports 465 or 993.
- Start TLS: Begins unencrypted, then upgrades to TLS during the session (used with ports 587 or 143).
- Start TLS When Available: Same as above but applies only if supported by the server.
Additional Options:
- Enable Encryption: Ensures secure access to the mailbox.
- Delete Messages After Handling: Automatically deletes messages after the system processes them (to avoid re-reading).
- Active: Toggle to enable or disable the configuration in the system.
Tab: Phishing Settings

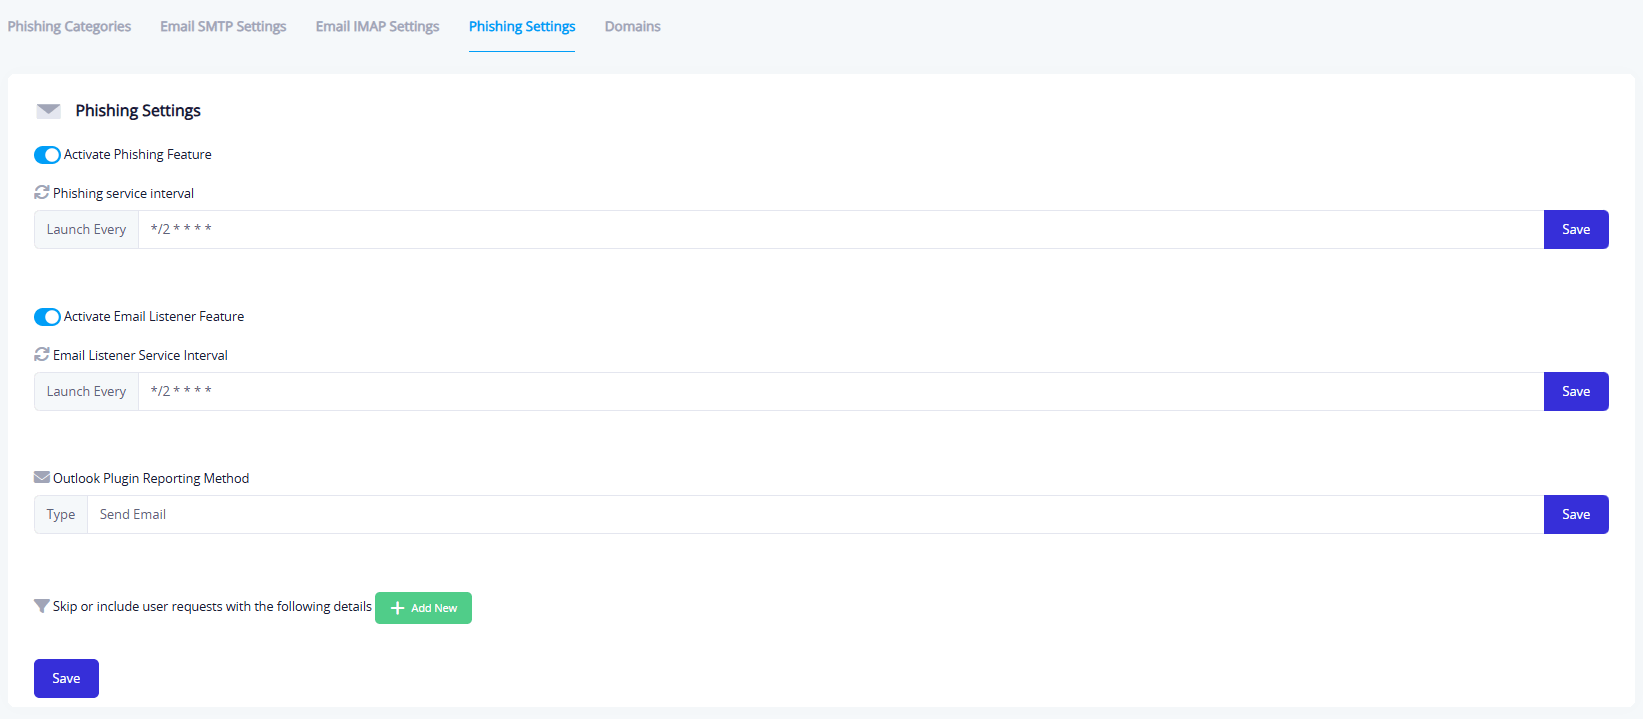
This tab is used to control the activation and behavior of the phishing service and email reading. It includes the following configurations:
- Enable Phishing Feature: Activates the phishing module system-wide.
- Service Execution Rate: For example, "Every 2 minutes".
- Enable Email Reading: Enables reading of employee email replies (if any).
- Email Reading Execution Rate: e.g., "Every 2 minutes".
- Outlook Reporting Method: Allows automatic alerts when suspicious activity is detected.
- Exclude Conditions: Add conditions to exclude specific users from campaigns.
Tab: Domins

This tab is used to manage the links inserted into phishing emails, which direct users to fake or simulated pages. It includes:
Top Left Buttons:
- Add Link
Link Fields:
- Name: A descriptive label for the domain, for easier identification (e.g.,
Outlook DomainorWebhook Domain). - URL: The full domain address that will be used in phishing messages (e.g.,
https://outlook-security-checks.com/demo-alerts)
- Export: Exports all link records as an Excel file (Name, URL).
- Import: Uploads links in bulk from an Excel file with the same structure (Name, URL).
Table Includes:
- Name: e.g., "Outlook Domain"
- URL: e.g.,
https://outlook-security-checks.com/demo-alerts - Actions: Options to edit or delete the link
These links help increase the realism and credibility of the phishing emails to simulate real-world scenarios more effectively.