Cybersecurity Incident Management
The Cybersecurity Incident Management page allows system administrators to monitor and handle reports related to threats, attacks, and security violations within the organization. This page provides a centralized interface to track incident details, verify their status, and take appropriate actions based on the type of incident.
All reports submitted by users are displayed, including the status, reporter, date, category, and available actions.
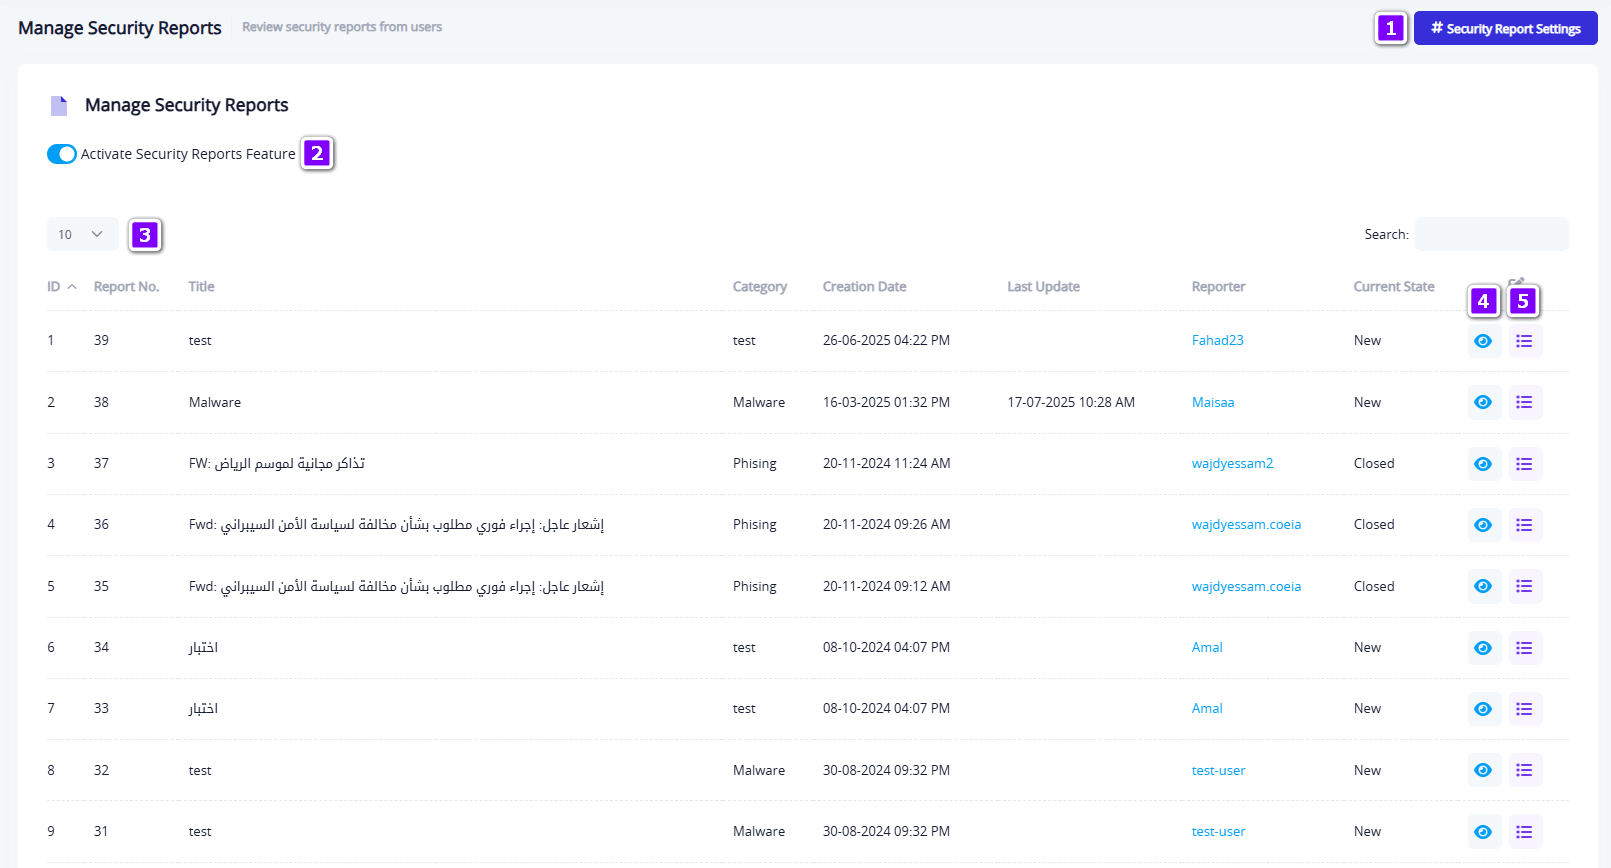
Table: Elements of the Cybersecurity Incident Management Interface (Based on Image Numbering)
| Description | Element/Button Name | No. |
|---|---|---|
| Opens a dedicated window for managing incident classifications. Admins can add, edit, or delete categories associated with incident reports. | Cybersecurity Incident Settings | 1 |
| Toggle switch to enable or disable the incident management feature on the platform. | Enable Cybersecurity Incidents | 2 |
| Allows searching within the incident table using report title, report number, or reporter's name. | Search Field | 3 |
| Opens a window showing complete details of the submitted report, including: report info, content, attachments, comments, linked classifications, and status. Admins can update the status or add internal notes when the status is "New" or "In Progress". | View Report Details | 4 |
| Opens the notification log for the report, showing all alerts sent to users, including timestamps, statuses, and details. | View Notification Log | 5 |
Cybersecurity Incident Settings Window
This window is used to manage the Cybersecurity Incident Classifications in the system. It's a core tool for organizing and analyzing reports based on their types. Admins can add, modify, or delete classifications that are later linked to reports.
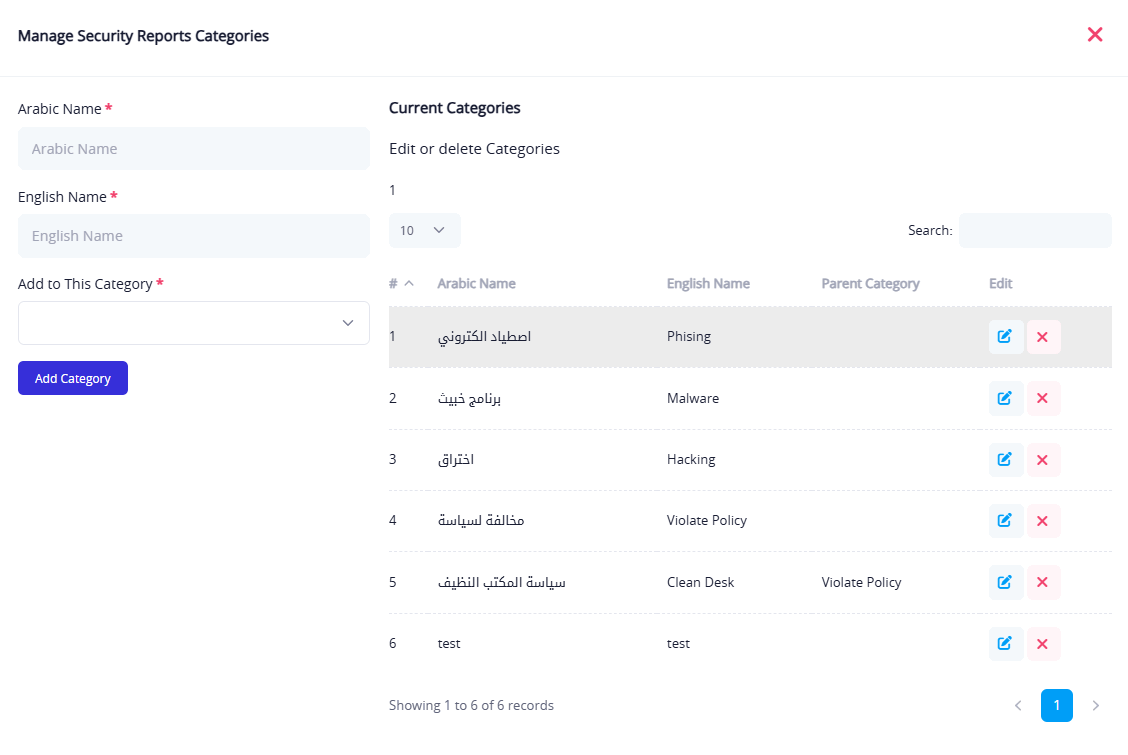
Right Panel – Management Form
Located on the right side of the screen and includes the following fields:
- Arabic Name The classification name as it appears in the Arabic interface.
- English Name The classification name in the English interface.
- Assign to Parent Category Used to define a parent classification if the current one is a sub-category.
- "Add Classification" Button
- When the form is filled without selecting a row from the table: it adds a new classification.
- When the "Edit" icon is clicked on a table item: the form switches to edit mode to update the selected classification.
Left Panel – Current Classifications Table
Displays a list of all previously created classifications with the following columns:
- #: Serial number.
- Arabic Name: Classification name in Arabic.
- English Name: Classification name in English.
- Parent Category: If this classification is a sub-category.
- Edit: Pencil icon to load the classification into the right-side form for editing.
- Delete: Trash icon to permanently delete the classification after confirmation.
Additional Tools
- Search Field: Used to search for a specific classification within the table.
- Entries Display Count: Allows choosing how many rows are shown per page.
Report Details Window
This window displays all the information related to a cybersecurity incident report submitted by a user. It enables the admin to review the data, view the content, classify the report, and update its status based on the handling process.
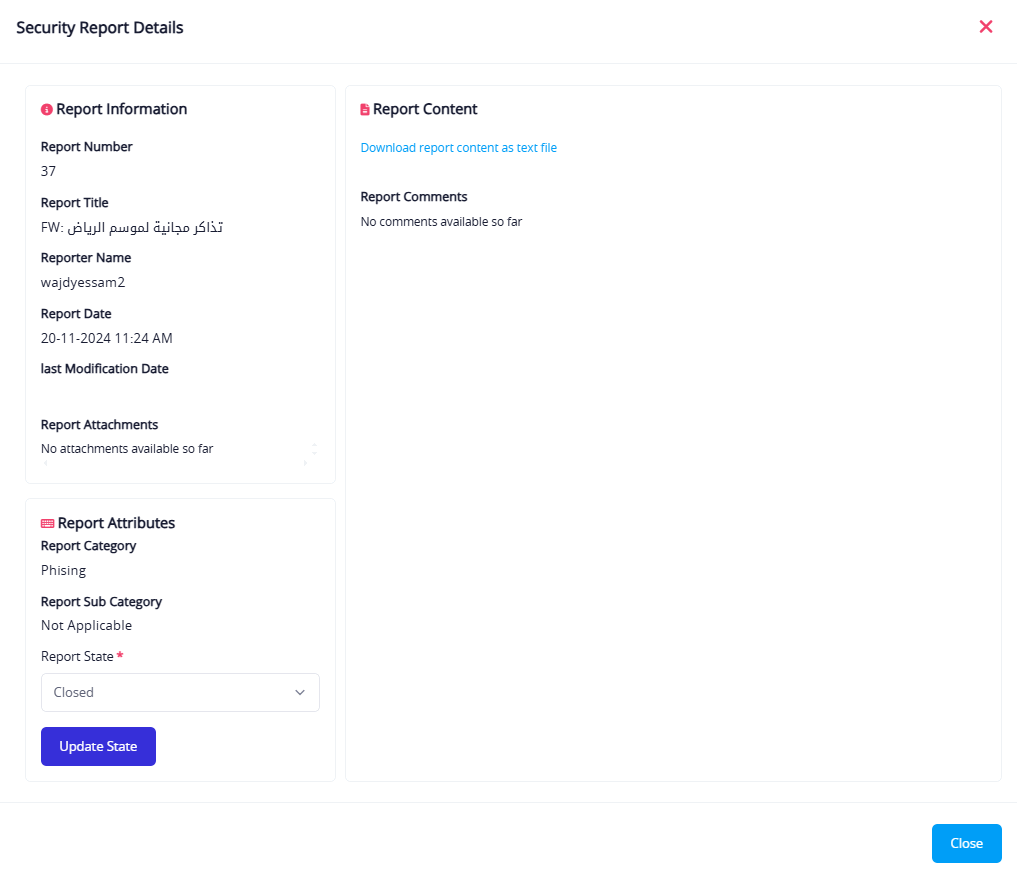
Window Sections:
Report Information (Top Right): Displays essential data about the report, including:
- Report Number
- Report Title
- Submitted By (username)
- Submission Date
- Last Updated
- Attachments (if any, shown as downloadable links)
Report Attributes (Bottom Right): Allows the admin to evaluate and update the report's status:
- Main Category: The primary classification of the incident (e.g., Phishing)
- Subcategory: If the report is linked to a sub-classification
- Report Status: Dropdown to select status:
- New
- In Progress
- Resolved
- Canceled (Incorrect Report)
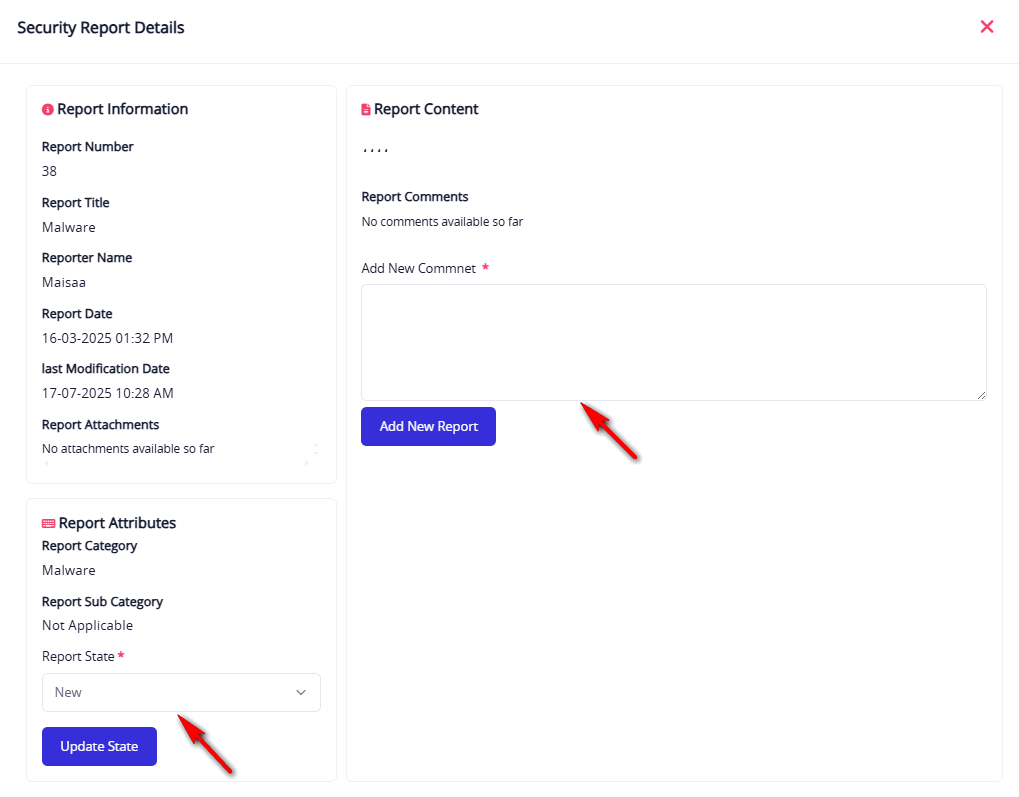
After selecting the appropriate status, click "Update Status" to save changes.
Report Content (Top Left): Displays the text of the report submitted by the user. If included, it can also be downloaded as a file.
- Download link format:
Click here to download the report content as a text file - If the report is marked as "New" or "In Progress", the admin can add comments for follow-up or internal documentation. If the report is marked as "Resolved" or "Canceled", only previous comments will be visible.
Notifications Window
The Notifications window displays the alert history related to a specific cybersecurity report. It allows the admin to track when the alert was sent, its status, and its duration.
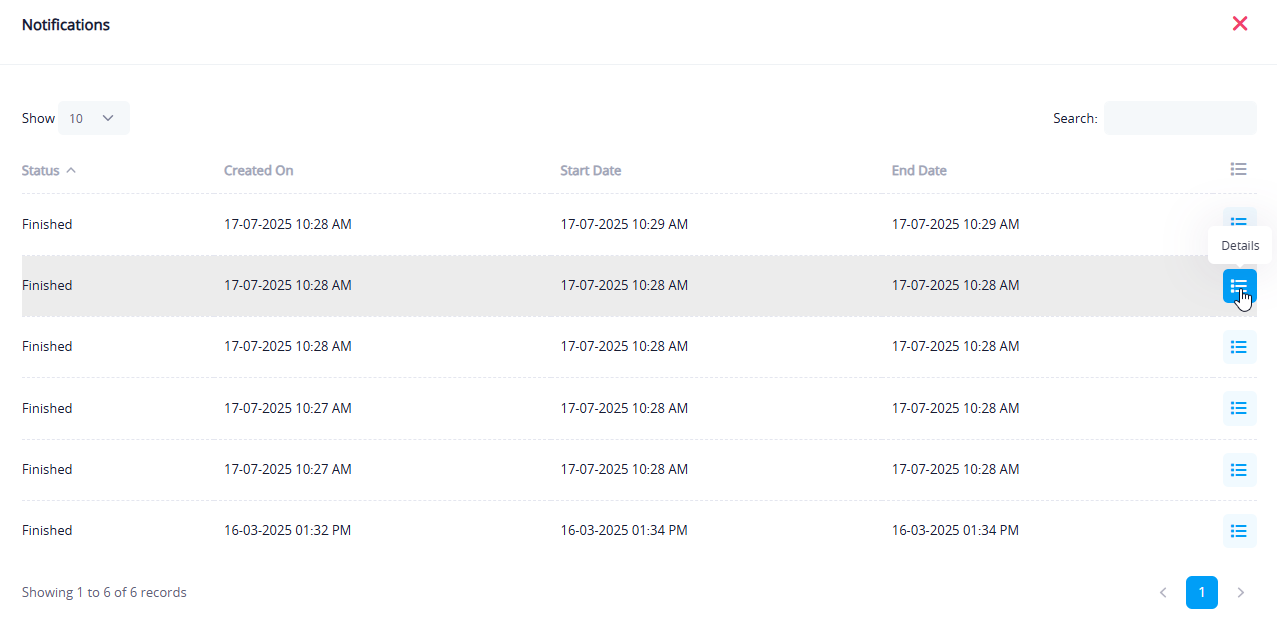
Table Columns:
- Scheduled Date: The date and time the alert was scheduled to be sent.
- Start Date: When the alert started being delivered to users.
- End Date: When the alert duration ended, if temporary.
- Status: Indicates whether the alert is still active or "Completed".
- Details Button: Opens a sub-window showing the delivery status for each targeted user, including:
- Email address
- Last delivery attempt date
- Delivery result (Success / Failure)
This helps verify whether the alert was actually received.
Notification Details Window
This window displays the delivery status of a notification to targeted users, along with delivery tracking info.
Displayed Elements:
- Status: Indicates whether the alert was successfully delivered to the user (e.g., "Success").
- Last Status Date: Date and time of the last delivery attempt to the specific user.
- Details: Shows the user's email address that the alert was sent to.
This interface helps confirm alert delivery to users and track any failures or delays. It is a key tool to ensure timely notification delivery.