Advanced Settings
The Advanced Settings section in Rawam platform provides system administrators with in-depth control over user data handling, connection mechanisms, and registration processes. This section includes several specialized tabs such as: Login Settings, Profile Settings, Connection Source Settings, Data Pull Settings, and Manual Registration Settings.

This section is designed to provide advanced customization options to help:
- Determine the profile fields displayed to the user and associated permissions.
- Manage external connection sources, define authentication methods, and handle whitelist and blacklist policies.
- Control how data is pulled from external sources manually or automatically, with options for updating schedules.
- Set different scenarios for manual registration, including user invitations and account activation.
With Advanced Settings, the platform can be configured to align with the organization's technical and security policies while ensuring smooth and secure integration with other systems.
Login Settings
The Login Settings tab offers a set of configurations that allow administrators to adjust how users log into the system while ensuring multiple security layers such as Single Sign-On (SSO), One-Time Passwords (OTP), and defining terms of use. These settings provide control over authentication methods, session time, and account lockout mechanisms after failed login attempts.
Elements in the Login Settings Tab:
General Settings:

-
System License: Shows the system's license status (e.g., Open).
-
Login Method:
Local: Internal login.ActiveDirectory: Only through Active Directory.ActiveDirectoryAndLocal: Support both methods simultaneously.
-
Authentication Data Source:
Login Page: Authentication through the platform's login page.LDAP SSO: Enable SSO login via LDAP.
One-Time Password (OTP):
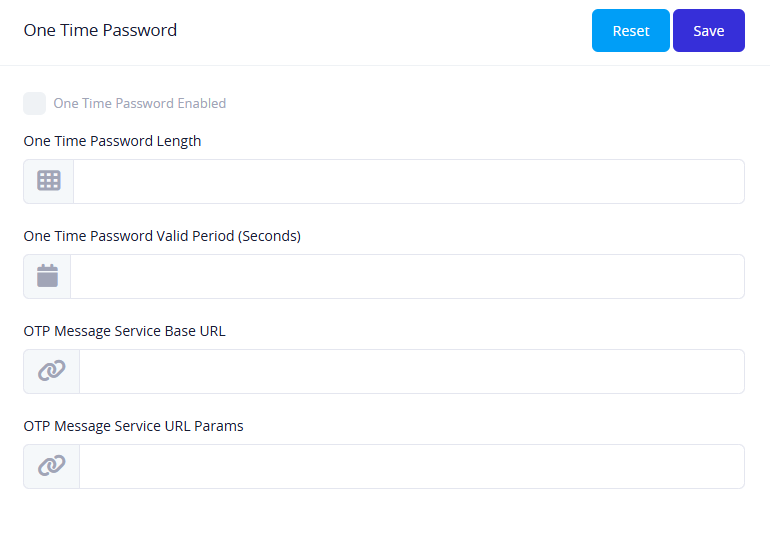
- Enable OTP: Enable or disable this feature.
- One Time Password Length: Defines the number of characters or digits in the OTP.
- One Time Password Valid Period (in seconds): Specifies the validity period of the OTP.
- OTP Message Service Base URL: The base URL used to send the OTP code.
- OTP Message Service URL Parameters: Additional variables sent with the OTP service URL.
Account Lockout:
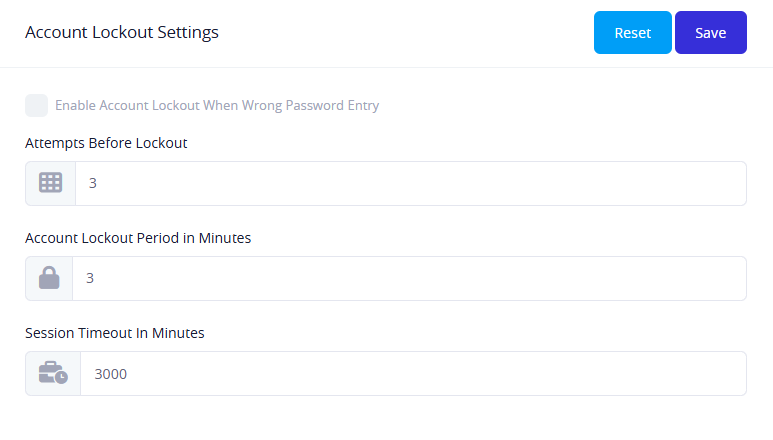
- Enable Account Lockout: After a certain number of failed password attempts.
- Number of Attempts: Specifies the maximum number of failed login attempts before the account is locked temporarily.
- Lockout Duration: The number of minutes the account is locked.
- Session Timeout: The number of minutes the session remains active before automatic logout.
Terms of Use Settings:
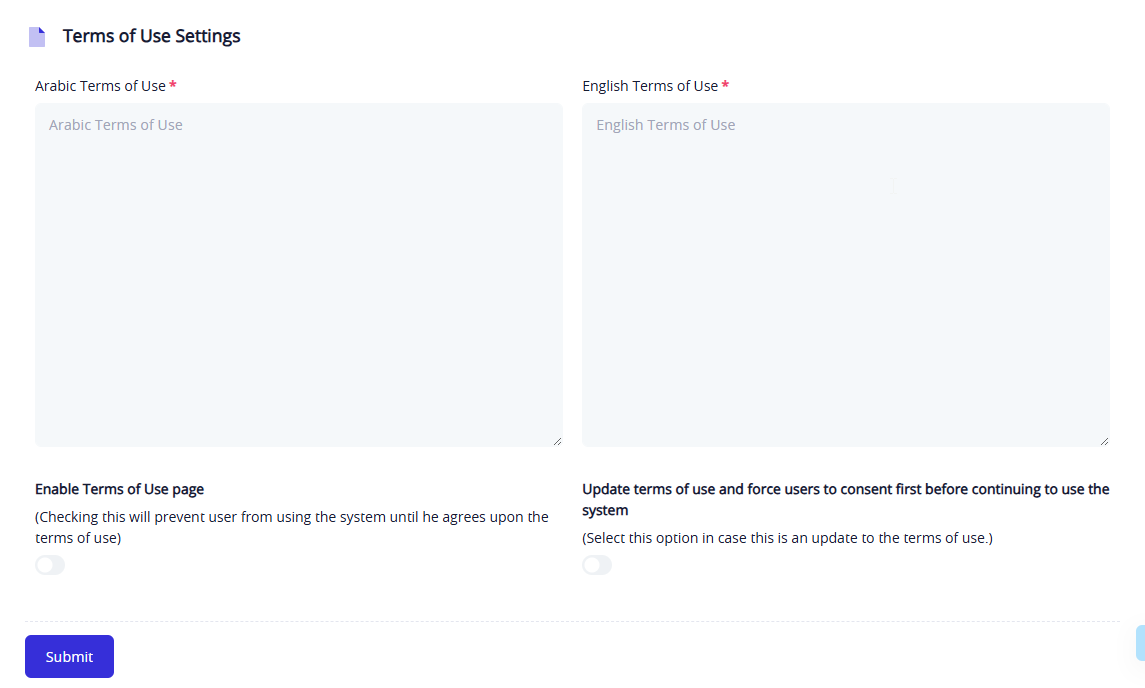
- Terms of Use (Arabic/English): Enter the terms for each language.
- Enable Terms of Use Page: Display the terms page on the first login.
- Force User Acceptance: Users cannot proceed unless they accept the terms.
Profile Settings
The Profile Settings tab allows administrators to customize how user information is displayed and edited in the system after login. Its contents can be divided into three main sections as follows:
Profile Mapping
In this section, administrators define the data to be displayed on the profile page, with the option to allow the user to edit each field individually.
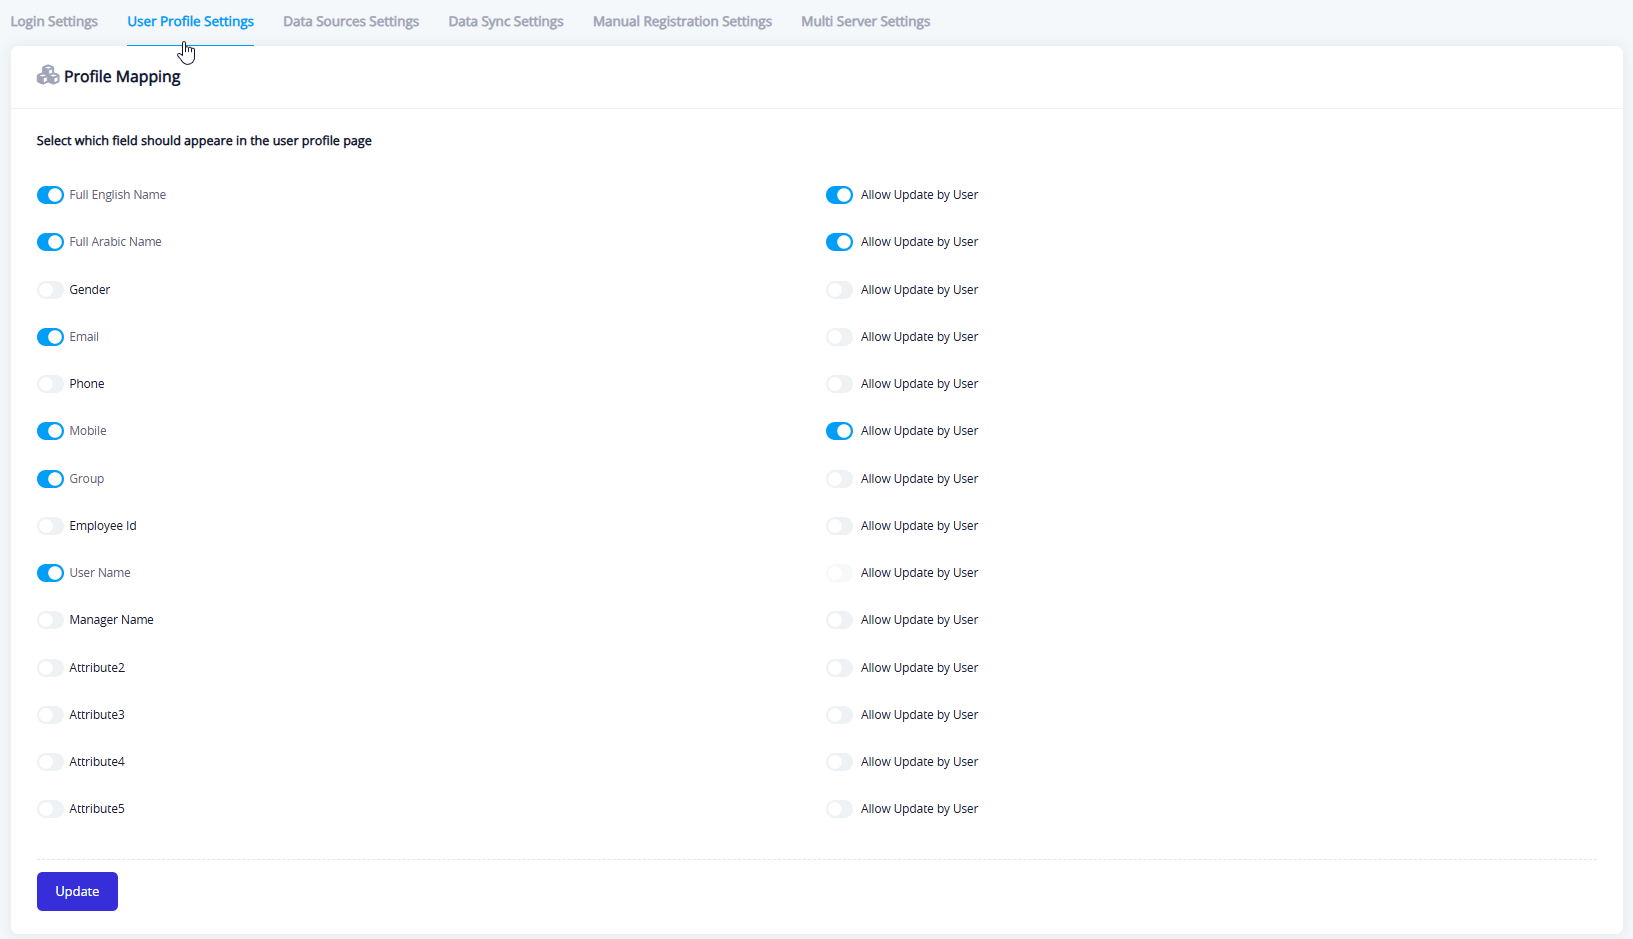
Available fields include:
- Name in both English and Arabic
- Gender
- Email address
- Phone and mobile number
- Department
- Employee number
- Username
- Manager name
- Additional customizable fields (Attribute 1 – 5)
Each field includes the option "Allow user to edit", enabling the user to modify their own data.
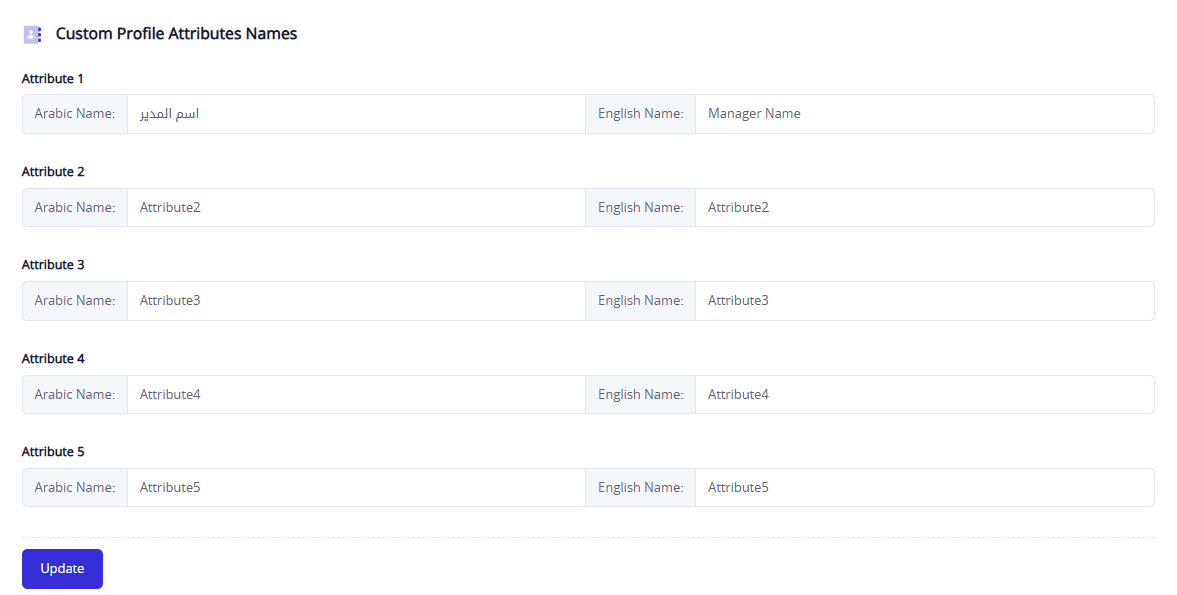
Custom Profile Attributes Names
This section allows customization of the names for the additional fields (Attribute 1 to Attribute 5) to suit the organization's needs. Each attribute name can be defined in both Arabic and English to ensure clarity and usability.
Other Features
This section contains additional settings related to the system's behavior after login:
- Redirect to profile page after login – When enabled, the user is immediately directed to their profile edit page after logging in.
- Force user to change current group – Allows specifying a new group to which the user is automatically moved if they belong to a certain group.

Data Sources Settings
The Data Sources Settings tab is an advanced feature that enables linking the system with external or internal data sources. It allows defining and managing these sources to facilitate data exchange or validate access permissions.
Main Components in the Connection Sources Settings Tab:
Connection Sources Management Interface

- Displays a table listing all added sources.
- The table includes columns such as: Arabic name, English name, username, Connection string, activation status, and edit tool.
- If no sources exist, a message appears stating: "No entries in the system."
(New Source) Button
- When clicked, a window appears to fill in the details of the new source.
Connection Source Data Form
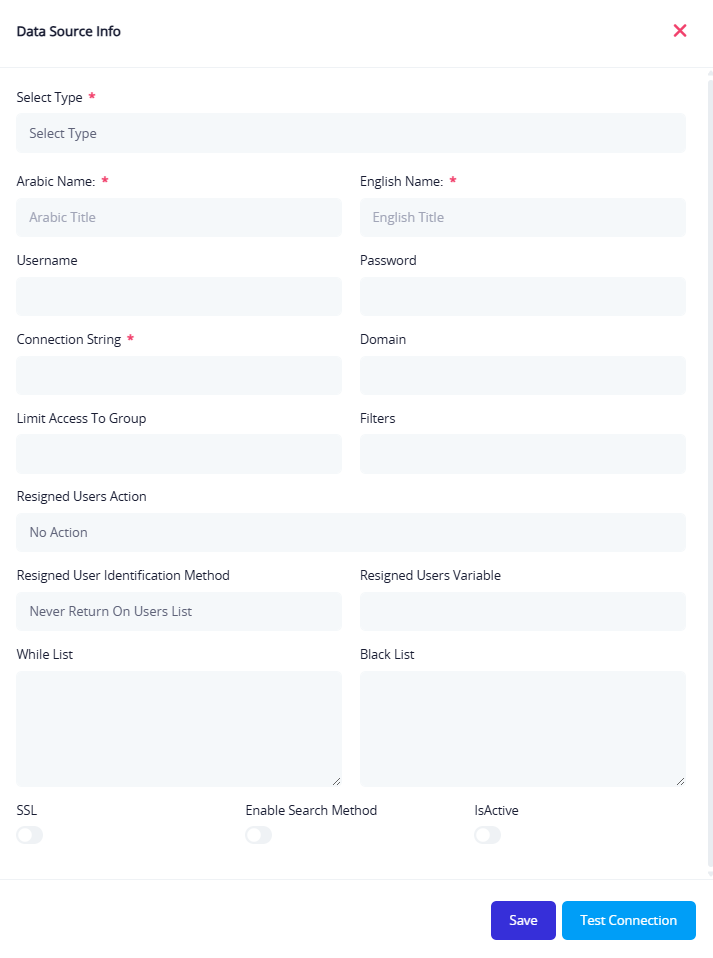
The form includes the following fields:
- Select Type: Type of connection (LDAP, Database, etc.).
- Name in both languages: The source's identifying name.
- Username and Password: Used to authenticate access to the source.
- Connection string: The connection address (e.g., URL or IP).
- Domain, Filters: Define the scope or filtering conditions for the connection.
- Limit Access To Group.
- Resigned User Identification Method: Specify whether to ignore or process them.
- Resigned Users Variable: Define if they will be returned to the user list.
- Blacklist and Whitelist: Control access or restrictions based on addresses or attributes.
- Additional options: Such as enabling search, SSL, and source activation.
Interactive Buttons
- Test Connection: Verifies the connection details before saving.
- Save Button: Saves the source details after entry.
Data Sync Settings
This tab is used to configure the connection and pulling of data from external sources—such as databases or other systems—for the purpose of automatically synchronizing user and department data with the platform. The tab is divided into two main sections:
Data Sync Settings
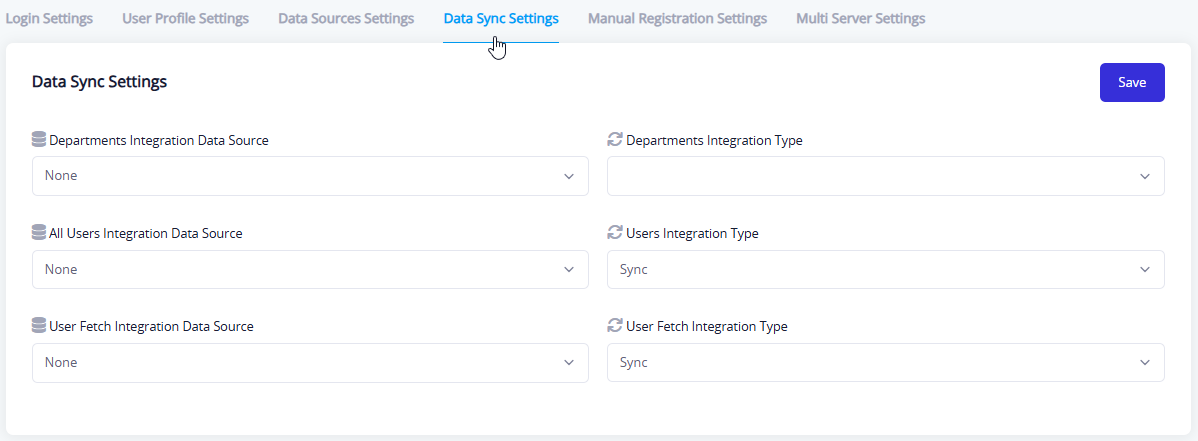
In this section, you define the source and connection method for each of the following:
- Department Integration Data Source
- Select the database source linked to departments (if available).
- Specify the connection method: synchronization (Sync) or other available methods.
- All Users Integration Data Source
- Define the source and connection method for all user data.
- User Fetch Integration Data Source
- Custom configuration for retrieving a single user's data when needed.
Auto Sync Settings

This section allows controlling whether data is pulled periodically or manually, and includes:
- Departments Auth Fetch
- Option to enable or disable automatic pulling.
- Set the refresh interval (e.g., every 5 minutes).
- When Fetched Users Count Greater Than License
- Define the appropriate action (e.g., Reject Fetch Operation).
- Data writing method in the database
- Specify the storage format (e.g., SQL or other).
- Delete active directory groups with no users
- Optional feature to clean up unlinked data.
Manual Registration Settings
This tab is used to manage and configure manual registration for new users in the system. It provides flexibility in defining how new users join and how their accounts are activated. It includes the following elements:
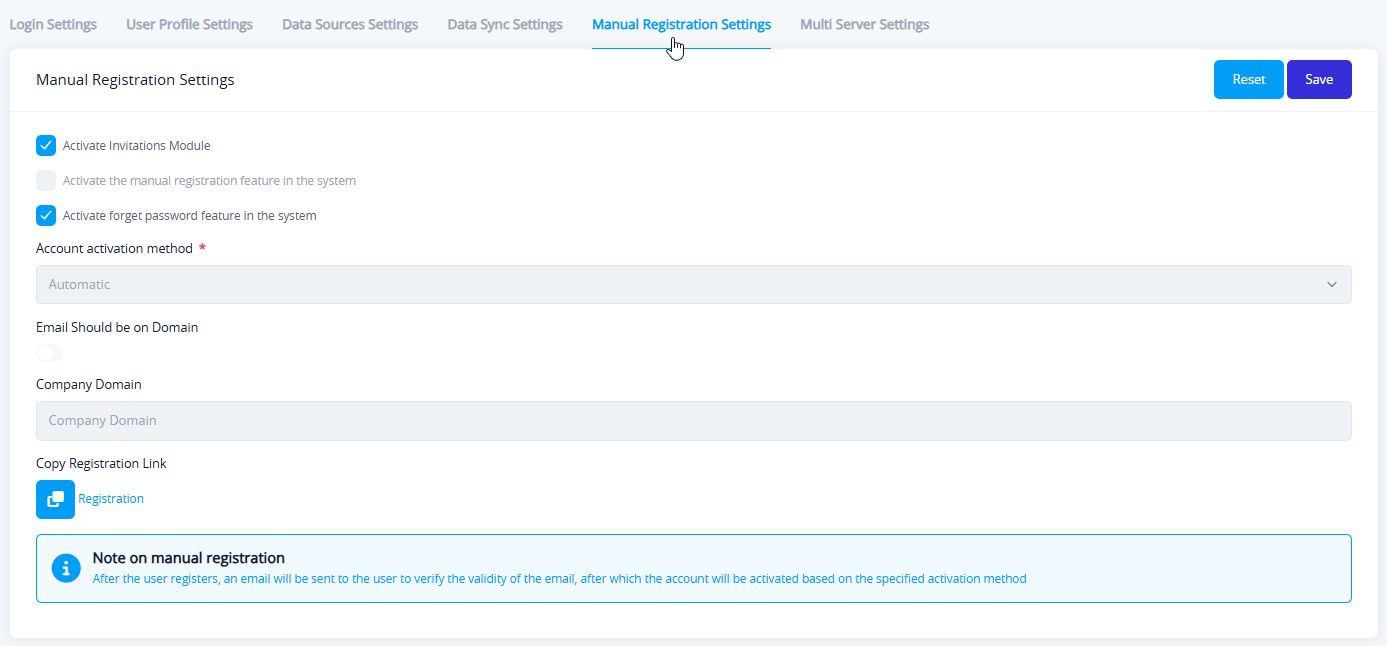
Main Screen Components
- Active Invitations Module When enabled, registration is only possible via an invitation link sent by a system administrator.
- Enable Manual Registration in the System When enabled, users can self-register via the registration interface.
- Active "Forgot Password" Feature Allows users to recover their password via email if forgotten.
- Account Activation Method Choose how the account will be activated after registration. Options include:
- Automatic: Activation occurs immediately after registration.
- Email Should be on Domain When enabled, only emails from a specific domain are allowed for registration.
- Company Domain Field to define allowed domains when the above option is enabled.
- Copy Registration Link Allows copying the registration page link to share manually or by email.
Important Note
After registration, a verification email is sent to confirm the user's email address. The account is then activated according to the selected activation method.